


Table of Contents
- What This Can and Cannot Do
- Step 1: Decide What You Are Automating
- Step 2: Build Your Topic Source
- Step 3: Connect WordPress Securely
- Step 4: Choose Your Automation Platform
- Step 5: The Research Step
- Step 6: The Outline Step
- Step 7: Section-by-Section Drafting
- Step 8: Featured Image Generation
- Step 9: Create the Draft with SEO Fields
- Step 10: The Human Approval Gate
- Keeping Quality Up as Volume Rises
- Five Upgrades Worth Adding Later
- Six Mistakes That Ruin the Pipeline
- What to Never Automate
- What It Costs to Run
- Final Thoughts
- Frequently Asked Questions
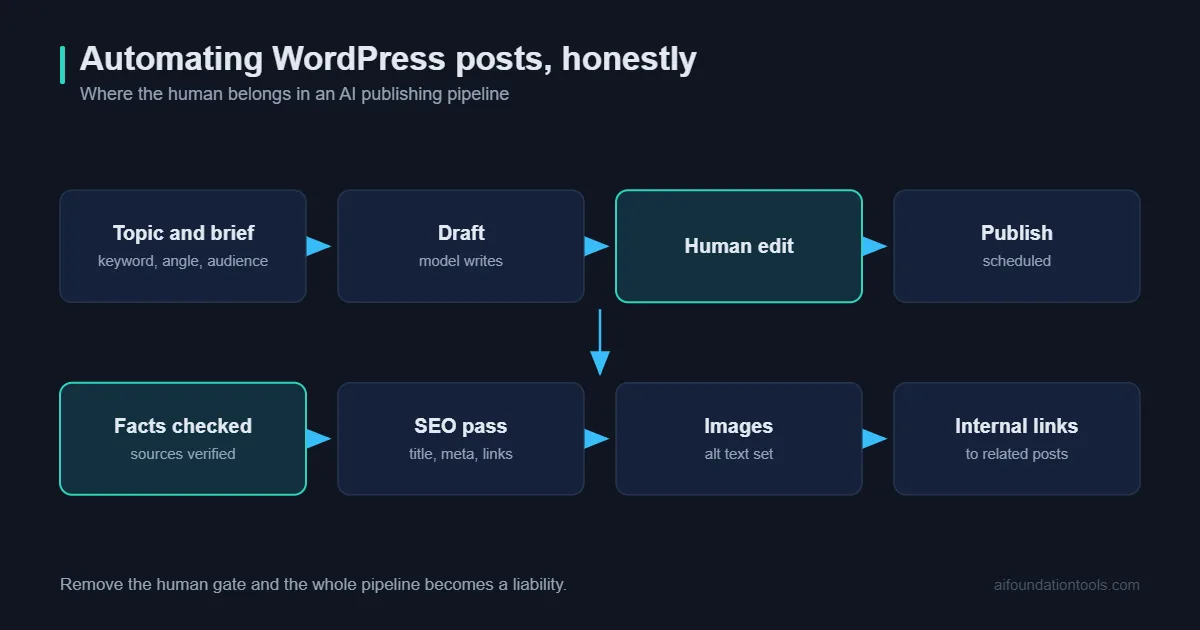
There are two versions of this idea. In one, a pipeline publishes forty articles a week while you sleep and your traffic quietly collapses six months later. In the other, a pipeline handles the mechanical eighty percent of producing a post and hands you a solid draft to finish.
This guide builds the second one, step by step. You can automate WordPress blog posts end to end without writing code, and the whole thing takes an afternoon – but the single most important component is the approval gate at the end, and it is the one most tutorials leave out.
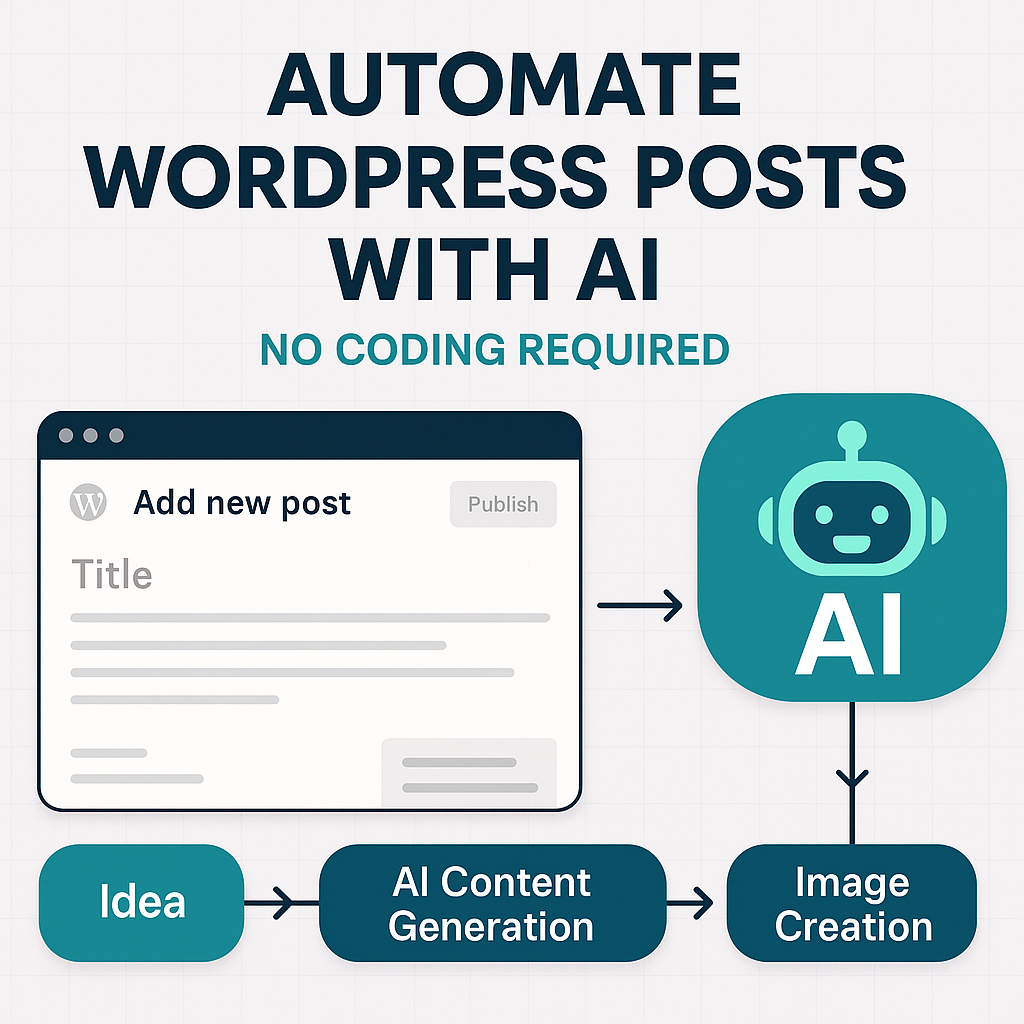
What You Can and Cannot Automate
Being clear about this up front saves disappointment.
It handles well: pulling topics from a list, structuring an article, drafting sections, generating a featured image, filling SEO fields, creating the draft in WordPress, and notifying you it is ready. That is genuinely most of the work.
It handles badly: knowing what your audience actually cares about, verifying facts, having an opinion, and judging whether a piece is good enough to publish. Those remain yours.
The realistic outcome when you automate WordPress blog posts is not zero effort. It is turning a five-hour job into a forty-minute one, mostly spent editing. That is an excellent trade, and it is a different promise from the one usually made.
Step 1: Decide What You Are Automating
Before you automate WordPress blog posts, write down which stages the pipeline owns and which you own. A sensible split: the machine does research collation, outlining, drafting, images and publishing mechanics; you do topic selection, fact-checking, the opinions and final approval.
Put that in writing before building anything. Pipelines expand quietly, and the day yours starts publishing without you reading the output is the day it becomes a liability.
Step 2: Build Your Topic Source
To automate WordPress blog posts, the pipeline needs to know what to write about. A Google Sheet is ideal – simple, editable from a phone, and easy to read from any automation tool.
Columns worth having: topic, focus keyword, search intent, the specific angle or gap, any facts you want included, status, and the resulting post URL.
That fourth column is the one that matters. If it is empty, the pipeline produces the same generic article as everyone else. Spending two minutes filling it in per topic is what makes the difference between content that ranks and content that exists.
Step 3: Connect WordPress Securely
WordPress has a REST API built in, and you authenticate with an application password rather than your real one.
Create a dedicated user with the Editor role – not Administrator. In that user’s profile, generate an application password and store it in your automation tool’s credential vault. If the automation is ever compromised, an Editor account limits what an attacker can do, and you can revoke the application password without changing your own login.
Test the connection by creating a trivial draft before building anything else. Ninety percent of setup problems surface here.
Step 4: Choose Your Automation Platform
| Platform | Best for | Cost pattern | Ceiling |
|---|---|---|---|
| n8n | Full control, self-hosting, complex logic | Flat if self-hosted | Very high |
| Make | Visual builders, mid complexity | Per operation | High |
| Zapier | Simplest setup, fewest steps | Per task, climbs fast | Moderate |
The n8n documentation covers the node patterns you will need. For this particular job, per-task pricing is a real consideration. A pipeline that drafts an article section by section makes a dozen or more calls per post, which is one execution on n8n and twelve tasks elsewhere. Our overview of n8n as an automation platform covers the trade-offs, and self-hosting it removes the per-execution cost entirely.
Step 5: The Research Step
Skip the research step and you automate WordPress blog posts nobody will read.
Add a step that fetches the current top-ranking pages for your keyword and extracts their headings. Feed that into the next stage as context, along with the angle you wrote in your sheet.
The instruction that matters: tell the model explicitly to identify what the existing articles all cover and what none of them cover. That gap becomes the spine of your piece.
Step 6: The Outline Step
One model call. Input: the keyword, the intent, competitor headings, your angle, your facts. Output: structured JSON with an H2 list and bullet points under each.
Insist on JSON rather than prose. Later steps need to loop over sections, and parsing free text is where these pipelines break.
Ask for eight to twelve sections including an FAQ and a conclusion. Any fewer and the article is thin; any more and it sprawls.
Step 7: Section-by-Section Drafting
This is the step that separates a decent pipeline from a bad one. Loop over the outline, generating one section per call rather than requesting the whole article at once.
Each call gets: the section heading, its bullet points, your supplied facts, a word target, and a banned-phrase list. That last one is worth building carefully – list every construction you never want to see, and the output changes character immediately.
Generating section by section costs slightly more in model calls and produces markedly better writing, because quality degrades across long generations and short focused prompts stay on target.
The detailed prompt patterns are covered in our guide to writing a WordPress blog post with AI – the same prompts work whether you run them by hand or inside a pipeline.
Step 8: Featured Image Generation
Generate an image prompt from the article topic, pass it to an image model, then upload the result to the WordPress media library through the REST API.
Two details people miss. Set the alt text – it is an SEO factor and it takes one extra field. And compress before uploading; generated images are often far larger than they need to be, and page speed matters more than image fidelity on a blog header.
Step 9: Create the Draft with SEO Fields
To automate WordPress blog posts safely, assemble the sections into HTML then create the post as a draft through the REST API.
Set at minimum: title, slug, content, excerpt, featured image, categories and tags. If you use Rank Math or Yoast, set the SEO title, meta description and focus keyword too – these can be written through the plugin’s own endpoint or a meta field, and doing it here saves you the most tedious part of the manual process.
Add a table of contents with anchor links, and insert the featured image once inside the body as well. Both are checklist items you would otherwise do by hand every time.
Step 10: The Human Approval Gate
The most important step, and the one that gets skipped.
When the draft is created, send yourself a notification with the preview link. Nothing publishes automatically. Ever.
Your review takes fifteen to thirty minutes: verify every factual claim and statistic, rewrite the introduction, add the specifics only you know, cut the sections that exist only because the outline suggested them, and check the internal links point somewhere sensible.
That is the difference between using AI to automate WordPress blog posts productively and running a content farm. The pipeline gets you to a solid draft; you get it to publishable.
Keeping Quality Up as Volume Rises
The failure pattern is predictable. Month one, every draft gets a careful edit. Month three, the reviews get shorter. Month five, things go out that nobody really read.
Four defences against that drift.
Cap your output deliberately. Decide how many posts a week you can genuinely review and build that limit into the schedule. A pipeline that can automate WordPress blog posts faster than you can edit them will eventually win, and the quality goes with it.
Keep a rejection rate. If you are approving every draft unchanged, you are not reviewing, you are rubber-stamping. Expect to substantially rewrite one in three.
Audit published output monthly. Pick two posts at random from the last month and read them properly. Drift is invisible day to day and obvious in a batch.
Update the prompts quarterly. Feed in your best-performing recent posts as new examples. Prompts written six months ago encode assumptions you have since moved past.
Five Upgrades Worth Adding Later
Get the basic pipeline working first. Once it is stable, these each add real value.
1. Internal link suggestions. Query your own sitemap, pass recent post titles and URLs to the drafting step, and instruct the model to link naturally where relevant. Internal linking is the highest-return SEO task and the easiest to forget.
2. A duplicate-topic check. Before drafting, search your existing posts for the keyword. Publishing two articles targeting the same phrase splits your own authority – the exact problem you are trying to solve by publishing more.
3. Automatic schema. FAQ sections can be marked up as structured data, which sometimes earns richer search results. Your SEO plugin may handle this if the FAQ is formatted consistently.
4. Performance feedback. Pull search data back into your topic sheet after a few weeks. Over time you learn which angles and formats actually work for your site rather than guessing.
5. A refresh queue. Point the pipeline at existing posts rather than new topics. Updating an article that already has ranking history often beats publishing a new one, and the same steps apply with the old content as input.
Six Mistakes That Ruin the Pipeline
1. Publishing without review. Said three times in this article for a reason.
2. Requesting whole articles in one call. Cheaper, noticeably worse, and harder to steer.
3. An empty angle column. Without a specific gap to fill, you automate WordPress blog posts that restate what already ranks.
4. No error notifications. A pipeline that has been failing silently for two weeks feels exactly like a pipeline that is working.
5. Admin credentials. Use a dedicated Editor account with an application password, always.
6. Scaling before validating. Produce five posts, review them honestly, and only then increase the cadence. Most people invert this and spend three months undoing it.
What to Never Automate
Publishing. Always a human click.
Statistics and citations. Models invent plausible numbers with complete confidence. Verify all of them.
Anything time-sensitive or newsworthy. The pipeline has no idea what happened this morning.
Legal, medical or financial claims. The risk is not worth the saving.
Your genuinely differentiated content. The pieces that build your reputation should be written, not assembled.
What It Costs to Automate WordPress Blog Posts
Three components, and one of them is not money.
Model calls. A section-by-section pipeline makes a dozen or more calls per article. At normal publishing volume this is a modest monthly cost, though it scales linearly with output.
Automation platform. Free tiers cover low volume. Self-hosting removes the constraint entirely once you are producing regularly.
Your review time. Twenty to thirty minutes per post, and it does not go away. Any plan to automate WordPress blog posts that does not budget this is planning to publish unreviewed content.
The honest comparison: this is dramatically cheaper than a freelance writer and dramatically more expensive than the “fully automated blog” promise implies.
Final Thoughts
The pipeline described here is not impressive to look at. It does not publish while you sleep, and it will not make you a content empire in a month. What it does is remove the four hours of mechanical work that sit between having an idea and having a publishable draft.
That is the honest value proposition. If you currently publish once a month because writing takes a whole day, this gets you to weekly. If you already publish weekly, it gets you to twice a week with better SEO hygiene than you were managing by hand.
Build it in an afternoon, run it for five posts, and be ruthless in the review. The teams who automate WordPress blog posts successfully are not the ones with the cleverest pipeline – they are the ones who kept editing seriously after the novelty wore off.
What the Finished Pipeline Looks Like
Assembled, the whole thing is roughly fifteen nodes and runs in two or three minutes per article.
A schedule or manual trigger reads the next unprocessed row from your topic sheet. A fetch step pulls the current top results and extracts their headings. One model call produces a structured outline. A loop runs over that outline generating sections. An image step creates and uploads the featured image. A final step assembles the HTML, creates the WordPress draft with SEO fields set, updates the sheet status, and sends you the preview link.
That is the complete system. Nothing exotic, and every step is a standard node.
The parts people get wrong are consistently the same two. First, the loop – it is tempting to replace it with a single call for the whole article, and the quality difference is immediately visible. Second, the sheet update at the end, which sounds trivial until the pipeline runs twice on the same topic and you have two competing drafts.
Build it in that order, testing each step before adding the next. A pipeline assembled all at once and then debugged is considerably more painful than one grown a node at a time, because the failure could be anywhere.
Once it works, resist expanding it for a month. The temptation to add translation, social distribution and internal linking immediately is strong, and each addition makes the whole thing harder to diagnose when something breaks.
Frequently Asked Questions
Do I need to know how to code?
No. Everything described here is visual nodes plus prompt writing. A little JavaScript helps with edge cases but is not required.
Will Google penalise automated content?
Not for being automated. Guidelines target unhelpful, unoriginal content regardless of how it was produced. A reviewed, fact-checked article with original input is fine. An unreviewed one probably is not, for reasons that have nothing to do with detection.
How many posts can I produce?
Technically you can automate WordPress blog posts without limit. Practically, as many as you can properly review – which for most people is three to five a week before quality slips.
Can it publish automatically if I really want?
It can. Do not. The failure mode is not that one post is bad, it is that fifty are and you notice in month four.
What about images and alt text?
Both automate well. Alt text is worth generating deliberately rather than reusing the title, since it is a genuine accessibility and SEO factor.
Is there a simpler version?
Yes – drop the automation entirely and run the same prompts manually. Our guide to AI content creation with free tools covers that approach, and it is the right starting point if you publish weekly rather than daily.
What breaks most often?
Authentication expiry, JSON parsing when the model returns prose instead of structured output, and image uploads. Add error notifications on all three.